Kitchen Hacks To Improve Your Kitchen
The kitchen is often considered the heart of a home. It is where delicious meals are prepared, memories are created and conversations flow. However, maintaining an efficient and organised kitchen can be a challenge. In this blog post, we will explore a variety of kitchen hacks that will help to improve your kitchen and keep it in tip-top shape. From dealing with unwanted ant invasions to enhancing the aesthetics of your kitchen.
Improve Your Kitchen And Keep It Pest-Free
How to Get Rid of Mice in the Kitchen
Mice can quickly become a nuisance in the home, scurrying around and leaving droppings everywhere. These tiny pests can cause damage by gnawing on furniture, walls and even electrical wires. Additionally, they carry diseases and allergens that can pose health risks to humans.
To effectively get rid of mice, it is crucial to seal off any entry points they may be using to enter the home, such as cracks in walls or gaps around pipes. Humane traps can be strategically placed along their usual pathways, while bait stations can help lure them away from living areas. It is also important to maintain cleanliness, as food sources left accessible can attract and sustain mouse populations. Seeking professional mice extermination may be necessary to help you rid the pests in your home.
How to Get Rid of Ants in the Kitchen
A pristine kitchen, free from the intrusion of ants and other pests, is crucial for maintaining a clean and hygienic cooking environment. Ants, with their relentless quest for food, can quickly become unwelcome guests, swarming around your food and countertops. Fortunately, there are several effective ways to get rid of ants and keep your kitchen pest-free.
Ant infestations can be a common issue, especially during warm weather. To reclaim your kitchen from these tiny invaders, consider the following strategies:
1. Use Natural Repellents
Ants have a strong aversion to certain scents, making natural repellents an excellent first line of defence. Here are some natural ingredients you can use:
- Cinnamon: Sprinkle cinnamon powder along the ant trails and entry points. The strong, spicy aroma of cinnamon disrupts the ants’ scent trails, making it difficult for them to navigate.
- Coffee Grounds: Used coffee grounds, when spread in areas where ants are entering your kitchen, can deter them. The smell of coffee is overpowering for ants and serves as an effective repellent.
- Crushed Mint Leaves: Crushed mint leaves or mint oil can be placed near ant-prone areas. The refreshing scent of mint repels ants and keeps them at bay.
2. Create a Vinegar Solution
White vinegar is a versatile and readily available ingredient in most kitchens. It can disrupt the ants’ scent trails, making it an effective solution for deterring these pests. Here’s how to use it:
- Mix equal parts of white vinegar and water in a spray bottle.
- Thoroughly wipe down countertops, kitchen surfaces, and areas where you’ve spotted ants. Pay special attention to the ant trails and entry points.
- Repeat this process regularly to maintain a scent-free environment that repels ants.
3. Seal Entry Points
Preventing ants from entering your kitchen in the first place is a proactive approach to pest control. Carefully inspect your kitchen for potential entry points, such as cracks, gaps, and openings, and seal them off:
- Inspect windows, doors, and any gaps in the walls for potential entry points.
- Use caulk or sealant to seal gaps and cracks.
- Replace damaged weather stripping around doors and windows.
- Ensure that screens on windows are free from tears or holes.
- By sealing off these entry points, you can create a barrier that prevents ants from infiltrating your kitchen.
4. Keep Food Containers Airtight
One of the primary reasons ants invade kitchens is the scent of food. To prevent attracting ants and improve your kitchen, it is essential to store food items in airtight containers:
- Transfer pantry staples like sugar, flour, cereals, and grains into airtight containers.
- Seal pet food bags or store them in airtight containers as well.
- Wipe down the exterior of containers to remove any food residue or sticky residues that may attract ants.
- By keeping your food tightly sealed, you eliminate the temptations that draw ants into your kitchen.


Kitchen Safety and Maintenance To Improve Your Kitchen
Maintaining a safe and organised kitchen is essential for the well-being of you and your loved ones. This includes not only keeping your kitchen tools in good working order but also knowing how to dispose of them safely when they are no longer usable. One such item that requires careful handling when it is time to part with it is kitchen knives. Here is how to properly dispose of kitchen knives, ensuring safety and environmental responsibility.
How to Dispose of Kitchen Knives
Kitchen knives can pose a hazard when not handled and disposed of properly. Here is a step-by-step guide on how to safely and responsibly dispose of them:
1. Use a Knife Block or Magnetic Strip
Prevention is the first line of defence when it comes to knife safety. By storing your knives in a knife block or on a magnetic strip, you not only keep them organised but also reduce the risk of accidents:
- Knife Block: Invest in a knife block designed to hold and protect your knives. This keeps the blades safely enclosed and easily accessible.
- Magnetic Strip: A magnetic strip mounted on your kitchen wall allows you to store your knives vertically, keeping them visible and out of reach of children and pets.
By using these storage methods, you minimise the risk of accidents and prolong the lifespan of your knives.
2. Recycle Metal Knives
If your kitchen knives are made of metal, such as stainless steel, they are often recyclable. Recycling is an environmentally responsible way to dispose of old knives. Here’s what you can do:
- Check with your local recycling program: Contact your local recycling centre or check their website for specific guidelines on recycling metal objects, including kitchen knives. Some recycling centres may have specific requirements for knife disposal.
- Clean the knives: Before recycling, make sure to clean any food residue from the knives. Rinse them thoroughly with warm, soapy water and dry them to prevent contamination in the recycling process.
- Wrap the knives securely: To prevent injuries to recycling centre workers, wrap the blades securely in newspaper or bubble wrap and secure them with tape. Label the package as “metal kitchen knives” for easy identification.
- Place in the recycling bin: Follow your local recycling guidelines for disposing of metal objects. This may involve placing the wrapped knives in your recycling bin or taking them to a designated recycling drop-off location.
3. Wrap in Cardboard or Towels
If recycling metal knives is not an option in your area, you can still safely dispose of them by wrapping the blades securely:
- Wrap the blade: Use several layers of thick cardboard or towels to cover the entire blade. Ensure that the blade is fully enclosed and cannot accidentally injure anyone.
- Secure with tape: Use strong tape, such as duct tape, to secure the wrapping tightly in place. This will prevent the blade from coming into contact with anyone handling it.
- Label as a sharp object: Clearly label the package as a “sharp object” or “knife” to alert others to its contents and potential danger.
4. Donate or Repurpose
If your kitchen knives are still in good condition but no longer needed, consider options that benefit others and reduce waste such as donating to a local charity. Many charities and organisations accept kitchen items, including knives, for donation. Ensure that the knives are clean and in good condition before donating them. By donating old knives, you not only prevent them from ending up in the landfill but also extend their utility and contribute to sustainability.
Kitchen Plumbing Solutions To Improve Your Kitchen
A smoothly flowing kitchen sink is essential for daily cooking and cleaning tasks. When faced with a stubborn clog, it is frustrating. However, before reaching for the phone to call a plumber, consider trying these effective methods to unblock your kitchen sink.
How to Unblock a Kitchen Sink
1. Boiling Water
The simplest method to tackle minor clogs in your kitchen sink is by using boiling water. This method is effective for clogs caused by grease, soap residue, or food particles that have not solidified into a major blockage:
- Boil a kettle of water.
- Carefully pour the boiling water down the drain in a steady stream.
- Allow the hot water to work its magic for a few minutes.
- Repeat the process if necessary.
This method often clears minor clogs by melting away grease and loosening debris, allowing water to flow freely.
2. Baking Soda and Vinegar
Baking soda and vinegar create a natural and eco-friendly combination that can help break down clogs in your kitchen sink:
- Start by pouring about a cup of baking soda down the drain.
- Follow it up with a cup of white vinegar.
- Allow the mixture to sit in the drain for 10-15 minutes.
- Flush the drain with hot water to wash away the clog and the fizzing reaction created by the baking soda and vinegar.
The chemical reaction between the baking soda and vinegar helps dissolve organic materials and can be effective for minor clogs.
3. Plunger
When dealing with more stubborn clogs, a sink plunger can be your best friend:
- Fill the sink with enough water to cover the drain.
- Place the plunger over the drain, creating a tight seal.
- Push and pull the plunger vigorously, maintaining the seal.
- Repeat this action several times until the clog is dislodged.
The pressure created by the plunger can break up and force the clog through the pipes, restoring normal flow.
4. Plumber’s Snake
For clogs that resist the plunger or are deeper within the pipes, a plumber’s snake (also known as a drain snake or auger) is a valuable tool:
- Insert the snake into the drain until you feel resistance.
- Rotate the snake handle clockwise while pushing it further into the drain.
- Continue to feed the snake until you feel it encounter the clog.
- Once you’ve reached the clog, rotate the snake in both directions to break it apart or hook onto it.
- Carefully pull the snake out, bringing the clog with it.
- Dispose of the removed clog properly.
A plumber’s snake is effective for tackling more severe clogs that other methods may not resolve.
5. Chemical Drain Cleaner (as a last resort)
Chemical drain cleaners should be used as a last resort due to their harsh chemicals, which can be harmful to both your plumbing and the environment. If all other methods fail:
- Follow the manufacturer’s instructions carefully.
- Wear protective gear, including gloves and eye protection.
- Pour the recommended amount of chemical drain cleaner into the sink.
- Wait for the specified time, usually 15-30 minutes.
- Flush the drain with plenty of water to remove the chemical residue.
Exercise extreme caution when using chemical drain cleaners, and ensure the area is well-ventilated.


Kitchen Organisation
A well-organised kitchen not only looks great but also functions efficiently. One common issue in kitchen organisation is misaligned or squeaky cabinet doors. Fortunately, you can easily address these problems by adjusting and maintaining your cabinet doors and therefore improve your kitchen. Here is a detailed guide on how to adjust kitchen cabinet doors for a smoother and more aesthetically pleasing kitchen.
How to Adjust Kitchen Cabinet Doors To Improve Your Kitchen
1. Check for Loose Screws
Before making any adjustments, start by inspecting the cabinet door hinges for loose screws. Over time, screws can become loose due to regular use and vibrations in the kitchen. Here is what to do:
- Open the cabinet door fully and inspect the hinges. Look for any screws that appear loose.
- Using a screwdriver, tighten any loose screws you find.
- Ensure all screws on both the cabinet door and the cabinet frame are secure.
Tightening loose screws may resolve minor alignment issues and alleviate squeaking.
2. Adjust the Hinge Position
Most cabinet hinges are designed with built-in adjustment screws that allow you to fine-tune the position of the door. Here is how to use these adjustment screws:
- Open the cabinet door fully to access the hinges.
- Locate the adjustment screws on the hinge. These are typically found on the hinge base plate or arm.
- Use a screwdriver to turn the adjustment screws. Turning them clockwise typically moves the door closer to the cabinet frame, while turning them counterclockwise moves the door away from the frame.
- Make small adjustments and test the door’s alignment after each turn.
- Continue adjusting until the cabinet door is properly aligned. Use a carpenter’s level to check if the door is even.
Remember to adjust both the top and bottom hinges for balanced alignment.
3. Level the Door
To ensure your cabinet door is properly aligned, it is essential to use a carpenter’s level. This tool will help you determine if the door is horizontal. Here’s how to do it:
- Place the carpenter’s level on the top edge of the cabinet door.
- Check if the bubble inside the level is centred. If it’s not, the door is not level.
- Adjust the hinge screws as mentioned earlier until the bubble is centered, indicating a level door.
Repeat the level-checking process for all cabinet doors that need adjustment.
4. Replace Damaged Hinges
If your cabinet hinges are damaged or worn out, adjusting them may not provide a long-term solution. In such cases, consider replacing the hinges with new ones. Here is how to do it:
- Remove the screws holding the old hinges in place, both on the cabinet door and the cabinet frame.
- Detach the old hinges from the door and the frame.
- Select replacement hinges that match the size and style of your existing ones.
- Attach the new hinges to the cabinet door and frame, securing them with screws.
- Make any necessary adjustments to the new hinges to align the door properly, as discussed in the previous steps.
Replacing damaged hinges ensures the longevity of your cabinet doors and improves their functionality.
5. Add Door Bumpers
Squeaky cabinet doors can be annoying, especially in a quiet kitchen. To prevent the squeaking, you can add soft door bumpers to the areas where the door makes contact with the cabinet body. Here’s how:
- Clean the contact points on both the cabinet door and the cabinet body to ensure they are free of dirt and debris.
- Peel the backing off the adhesive side of the door bumpers.
- Carefully place the door bumpers on the cabinet frame where the door touches when closed.
- Close the cabinet door, and the bumpers will create a soft cushioning effect, preventing squeaking.
These door bumpers not only eliminate noise but also protect the finish of your cabinet doors and improve your kitchen.
Kitchen Aesthetics To Improve Your Kitchen
Your kitchen’s appearance plays a significant role in how you feel about the space. If you are looking to refresh your kitchen without breaking the bank, changing up your kitchen cabinets is the best way to make an impact. You can easily get the kitchen cupboard doors replaced with new ones. Don’t worry if you have odd-shaped doors either, you can have bespoke kitchen cupboard doors made to order by companies such as Lovech, this way you won’t need to replace your entire kitchen cabinet set. This is great news especially if you’ve got a kitchen layout you love and simply can’t replace or just want a bit of a facelift on a winning format.
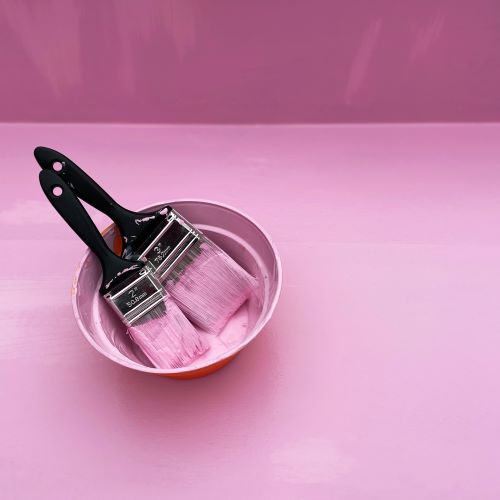
Alternatively, painting your kitchen cupboards can be a cost-effective and transformative solution. Here is a detailed step-by-step guide on how to paint your kitchen cupboards to help you achieve a stunning makeover.
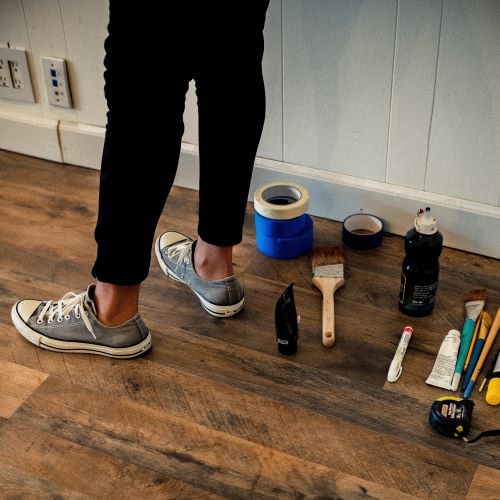
Materials Needed:
- Screwdriver: To remove cabinet knobs, handles, and hinges.
- Sandpaper: Medium and fine-grit sandpaper for smoothing the cupboard surfaces.
- Tack cloth: For wiping away dust and ensuring a clean painting surface.
- Primer: To help paint adhere better and ensure even colour coverage.
- Paint: Choose either latex or oil-based paint, depending on your preference and the type of finish you desire.
- Paintbrushes or rollers: For applying paint evenly.
- Painter’s tape: To protect areas you don’t want to paint, such as walls or countertops.
- Drop cloths or plastic sheeting: To cover and protect the surrounding area from paint splatter.
Steps to Paint Kitchen Your Cupboards and Improve Your Kitchen:
1. Remove Hardware
Start by emptying your cabinets and removing all cabinet knobs, handles and hinges using a screwdriver. Place the hardware in a safe place to ensure they are not lost or damaged during the painting process. This step will make it easier to paint the cupboard doors and drawers without obstructions.
2. Clean and Sand
Proper preparation is crucial for a successful paint job. Follow these steps:
- Thoroughly clean the cupboard surfaces with a gentle cleaner to remove grease, dirt and grime.
- Once cleaned, use medium-grit sandpaper to lightly sand the cupboard surfaces. This will create a slightly rough texture, allowing the primer and paint to adhere better.
- Follow up with fine-grit sandpaper to smooth the surfaces, removing any imperfections from the previous sanding.
- Wipe away any dust or debris with a tack cloth to ensure a clean, dust-free surface for painting.
3. Apply Primer
Primer is essential for achieving a professional-looking finish and ensuring the paint adheres properly to your cupboard surfaces. Here is what to do:
- Stir the primer thoroughly and apply it evenly to the cupboard surfaces using a paintbrush or roller.
- Allow the primer to dry completely according to the manufacturer’s instructions. This typically takes a few hours or overnight.
- Primer helps to create a smooth and even surface for the paint and prevents wood stains or imperfections from bleeding through the paint layers.
4. Paint
Now it is time to bring your kitchen cupboards to life with paint. Follow these steps for a flawless finish:
- Choose your preferred paint (latex or oil-based) and colour. Make sure to stir the paint well before applying.
- Use a high-quality paintbrush or roller to apply the paint in thin, even coats. Start with the cupboard doors and drawers, then move on to the cabinet frames.
- Allow each coat to dry completely before applying the next one. This may take a few hours, depending on the type of paint you are using.
- Typically, two to three coats of paint are sufficient to achieve full coverage and a smooth finish.
5. Reattach Hardware
Once the paint has dried thoroughly and you are satisfied with the colour and finish, it is time to reattach the cabinet knobs, handles and hinges. Be careful not to damage the fresh paint during this process. Make sure everything is securely fastened.
6. Add Finishing Touches
To ensure a polished look, use painter’s tape to protect any areas you do not want to paint, such as the walls or countertops. Apply the tape carefully and remove it once the paint is dry to avoid peeling off any fresh paint.
7. Cleanup
Dispose of paint cans and brushes according to local regulations. Clean your brushes and rollers thoroughly with the appropriate cleaning agent, whether it is water for latex paint or mineral spirits for oil-based paint.
By following these steps, you can give your kitchen cupboards a fresh, updated look without the expense of a full kitchen renovation. Painting your cupboards can breathe new life into your kitchen and provide a stunning transformation that enhances the overall aesthetics of your cooking space.
It Is Easy To Improve Your Kitchen
Your kitchen is a space that should be both functional and visually appealing. These kitchen hacks and tips cover a wide range of topics, from dealing with ant invasions and safely disposing of kitchen knives to resolving common plumbing issues and improving the aesthetics of your kitchen cupboards. By implementing these clever ideas and tips, you can improve your kitchen and ensure that your kitchen remains a welcoming and efficient hub for all your culinary adventures.
*This page contains affiliate links*